Monday 27 August 2012

Craft Night Road Trip

Hello everyone! 

Two of the Crafterteers went on a mini road trip today to Beamish Open Air Museum in County Durham. They had a quilt exhibition on over the weekend so Amy and I went to check it out - we both have passes to get in free which was a bonus too! The museum is an open air museum, great on a bank holiday in August right! No, it was drizzling the whole time (see the very soggy sign below!), but we made the most of it and wrapped up warm :)

Beamish is one of my favourite museums, and they have a fantastic collection of locally made quilts from the 1800's to the present day. The exhibition was put on with the Quilters Guild, and mixed quilts old and new - with the newer quilts inspired by the ones from the museum's collections.


These are some of the old and new quilts on display, we both really like the family tree (second one from below) which told the family history of the quilt maker, complete with photographs and quotes from marriage certificates. It went all the way back to the 16th Century which was pretty amazing!


The display also had a few hands on elements, and a display from the Young Quilters Guild. They also had some members of the Quilters Guild there to speak to, who were doing lots of English Paper Piecing.

The most interesting part of today was finding out about regional craft groups from the past! Both from the exhibition displays, but also the brilliant book I bought afterwards, about how craft groups have been going on amongst groups of women for centuries - made me feel part of a long tradition! It is amazing to think that our little approx-once-a-month craft night is doing all the same things those women used to do, getting together to help each other out, figure out how to create new patterns, and eat and talk!


I particularly like this little passage above about the preparations for craft night being an "awful sight", and the worst thing about craft night was that the women were looking after themselves and not their men! Good on 'em!


The rest of the museum also had some bits and pieces on display, including a yoyo quilt and a fantastic granny square blanket in some fantastic colours!

Oh, and before I forget, this was my new book Amy talked me into getting...


A catalogue of Beamish quilt collections, but also a decent handful of women's history in there too, makes me feel itchy for my History degree days!

See y'all next time!

Love Ali

xx

Wednesday 22 August 2012

Craft Night a la Swaddle

Hello everyone! 

We had our second Craft Night since starting the blog on Monday night. It was over to Laura's this time (we take it in turns to host, share out the cooking etc.). 5 of us made it this time, and were treated to some very lovely home made pizza, chips and salad, and a particularly lovely Chocolate Cheescake, with strawberries and cream, nom! We then made our way up to Laura's study/craft room depending on what time of day/night! 


View from Laura's kitchen, lovely sunny afternoon :)


We had a new friend joining us this time, craftertime is expanding! Laura's friend from choir Becky came over to say hi and do some squeaky knitting! It is great to have a new face, and to help us expand our crafting repertoire - Becky was knitting a doll of Audrey Hepburn! It was only the start, but she did get the body done, including some accidently inverted row we generally decided were in the right place for her boobs!


Laura was working on her beautiful granny square afghan, this has been a fairly long term project she has been returning to as an 'in betweener' and is sooo close to being done, depending on how big it ends up being. 

We had a good discussion about the relative number of blankets we have in our houses, compared with the number of people that live there - Laura's other half had assumed her blankets were gifts... no... But came happily to the conclusion that as long as we are happy, and not bankrupting ourselves/pimping ourselves out for yarn and fabric, we are all good!

Amy was starting a new project. A self confessed fan of learning a craft to achieve an end product, rather than to actually learn it, took up a challenge from Mollie Makes to make some crochet star bunting. Having been a while since Amy's last project this took a little more effort than expected! I was trying to be a good tutor, but after half a bottle of rose this wasn't the easiest! We came up with a few different versions, the pattern was not written clearly, a shame as I fancied the book it came from and have now been put off! 


I did manage to try again whilst sober, and did manage it, but pattern was still annoyingly difficult to follow!


Fiona was working on sewing a read rectangle! Early starter on Christmas crafting, Fiona refuses to go anywhere need crochet (mutterings about the devil's craft...) and started off with the border for her embroidery - watch this space for more!


I was mainly drinking wine and helping Amy with her crochet to limited success, and trying to finish the wiggly edge on my crochet blanket, I've been lusting after crocheted edged items on Pinterest for a while, don't quite know why but felt my bed blanket needed some additions! I also brought along a blanket I'm making for a pregnant friend, but as it was just sewing in the ends I didn't actually touch it all night!


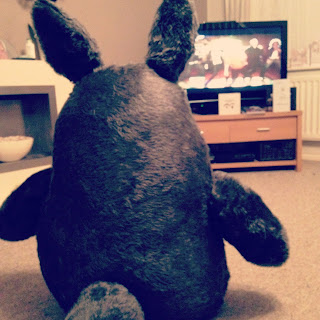
And that be it! Oops, almost forgot, we had Amy's lovely little friend come to join us too! Totoro is adorable, very cute and also a fantastic back rest!


Gives you a sense of the scale of Totoro!


See y'all next time,

Ali

xx

Saturday 18 August 2012

Peppermint Butler goes Crochet!

Hey y'all it's Alison back again. Today I'm going to be telling you how to make you're very own little Peppermint Butler amigurumi. Peppermint Butler is Princess Bubblegum's butler, in the AMAZING cartoon Adventure Time. If you have not seen it, hunt it out - in the UK it's on Nickelodeon I think (to tell the truth it is usually my other half that puts it on, so I'm not totally certain of location!).

This is what he is meant to look like, very dapper!
He isn't *too* complicated of a shape to make, pretty much a circle with legs! I've only seen one other version (which I think you will agree is pretty impressive - awesome peppermint butler plushie ) but he doesn't have a pattern, and this version should be much quicker to make! He took me a few hours, none of the stitches are complicated and if you can already crochet this won't be the most arduous!

Here is the final product, so you know what you are aiming at.

I used small quantities of white, red and blue acrylic yarn, and a 3.75mm crochet hook.

BODY (basically a big peppermint!)

  • Chain 4 and join with a slip stitch to form a ring
  • Chain up 3 and 11 double crochet into ring, join with slip stitch
  • Chain up 3 and 2 dc in each stitch all around, join with slip stitch
  • Chain up 3 and double crochet in same stitch, then *2 dc and 1 dc in each stitch* all around, join with slip stitch
  • Chain up 3 and repeat pattern as above row, but for every 4 stitches in white, add 3 in red, join with slip stitch
  • Slip stitch all around, keeping scheme with colour, white stitch for white stitch, red for red etc. (This will pull the circle tight slightly and give an 'edge' to your previously flat circle)
  • Repeat all steps, stopping before row where you add red.
  • Whip stitch this finished circle to the first part, leaving a gap for stuffing
  • Stuff and finish stitching
PANTS (blue yarn)
  • Chain 34 (approx, stretch and play with this to get it the right size) and join with a slip stitch into first stitch
  • Chain up 2 and *double decrease, half double crochet* all around (that might take some 'splainin, for double decrease- yarn over, insert hook and pull through loop, insert hook in second stitch and pull through loop, yarn over and pull over all previous stitches, leaving 1 on hook), join with slip stitch
  • Chain up 2 and double decrease all around, join with slip stitch 
  • Chain up 2 and half double decrease all around, join with slip stitch
  • Slip stitch bottom closed
ARMS AND LEGS (Blue yarn)
  • For arms chain 6
  • For legs chain 10
  • Sew each in place on blue pants
BOW TIE
  • Thread a yarn needle with red wool, put a stitch in the middle of the blue pants and tie a bow with thread ends
FINISHING
  • Using black thread sew on Peppermint Butler's vacant stare!
  • Using white or blue thread, whip stitch blue pants to the bottom of his pepperminty torso.
Done!


Enjoy this little dude!

Love Ali

xx
Friday 17 August 2012

Crochet Bunnies!


Hey everyone, Laura here!

It's crochet time again! If you're new to the craft, little toys and amigurumi are a fantastic way to learn new stitches, whilst working towards a quick win. 

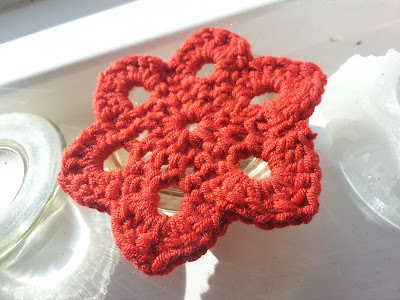
This cute pair were a birthday gift I made for a Alison a few months ago, modelled after her very own pet bunnies Mac and Horatio (one has sticky up ears, one has floppy ears!).

At the time, I didn't have much experience making little toys like this, but the pattern was really well written and pretty straightforward. I tweaked it a little by using buttons for their eyes, to give it a bit more of a Coraline vibe - they are the 'Other Bunnies'! 

If you fancy making your own, check out the pattern over on Craft. The clever lady who designed them also has a lovely site full of cute crochet patterns, which I urge you to check out!


'Other Mac' and 'Other Horatio'

If you decide to make your own, as always, we'd love to see a picture!

Wednesday 15 August 2012

Totoro!

Hi all!

Mixing things up again, Amy here.
For those of you that don't know me I love "My Neighbour Totoro"! He was the reason behind me learning to crochet (a previous project of mine) and the reason behind this crafting venture. If you're reading this and have no idea who he is, well I can fix that!


I've recently been on holiday to France, Paris specifically, and their love of comics/manga/general geekiness is not a secret. Soooo with high hopes I set about trying to find me a Totoro, as big as I could fit into my suitcase. We'd seen one last year (when I was less foolish and didn't buy it immediately) so I was pretty confident I could acquire one, but alas it was not meant to be.

A discussion with my fellow insane crafters resulted in finding this beauty online, but this was not the scale I was looking for, so I got my oh so helpful husband to blow up the pattern for me so this occurred:


Realising that this could work I found myself at the fabric store rummaging through the faux fur section. And here we are, a simple step by step guide, should you too have the need for a massive Totoro in your household!

Firstly I mapped out all the pieces on the reverse of the fabric using chalk, then cut them all out.


I then pinned the stomach and stomach pieces in place. I stitched the little marks through both layers of fabric to keep it all in place. He's starting to take shape! (the ears are not attached yet, i was just checking he looked ok!)


It was then simply a case of pinning them front sides together and running it through the machine, not forgetting to leave a hole at the top for the stuffing! I pinned the eyes and nose on at this point but didn't stitch them on until he was turned the right way round - Totoro's face, like any character has to be just right or he just looks sinister! Having decided I was pleased with him, I could then go spend a load of money on stuffing! I thought I'd best take a helper, cue oh so helpful husband again!


I then stuffed and stitched ears, arms and a tail before finally stuffing the main body and of course stitching the eyes and nose in place. I kept stuffing whilst stitching together his head to keep him firm and to support the ears which went on next. I used wool to stitch them in place as it was strong enough to keep them upright. Finally I attached arms, and a tail in the same way and ta-dah!


One massive Totoro! I was pretty chuffed with him :) He only took a day to make and was great fun. The fur fabric is very forgiving so if you're not the neatest of crafters don't worry! One word of caution though, he does like watching a spot of tv.........


Until next time!
Amy :)
Related Posts Plugin for WordPress, Blogger...