Showing posts with label tutorial. Show all posts

Wednesday, 15 August 2012

Totoro!

Hi all!

Mixing things up again, Amy here.
For those of you that don't know me I love "My Neighbour Totoro"! He was the reason behind me learning to crochet (a previous project of mine) and the reason behind this crafting venture. If you're reading this and have no idea who he is, well I can fix that!


I've recently been on holiday to France, Paris specifically, and their love of comics/manga/general geekiness is not a secret. Soooo with high hopes I set about trying to find me a Totoro, as big as I could fit into my suitcase. We'd seen one last year (when I was less foolish and didn't buy it immediately) so I was pretty confident I could acquire one, but alas it was not meant to be.

A discussion with my fellow insane crafters resulted in finding this beauty online, but this was not the scale I was looking for, so I got my oh so helpful husband to blow up the pattern for me so this occurred:


Realising that this could work I found myself at the fabric store rummaging through the faux fur section. And here we are, a simple step by step guide, should you too have the need for a massive Totoro in your household!

Firstly I mapped out all the pieces on the reverse of the fabric using chalk, then cut them all out.


I then pinned the stomach and stomach pieces in place. I stitched the little marks through both layers of fabric to keep it all in place. He's starting to take shape! (the ears are not attached yet, i was just checking he looked ok!)


It was then simply a case of pinning them front sides together and running it through the machine, not forgetting to leave a hole at the top for the stuffing! I pinned the eyes and nose on at this point but didn't stitch them on until he was turned the right way round - Totoro's face, like any character has to be just right or he just looks sinister! Having decided I was pleased with him, I could then go spend a load of money on stuffing! I thought I'd best take a helper, cue oh so helpful husband again!


I then stuffed and stitched ears, arms and a tail before finally stuffing the main body and of course stitching the eyes and nose in place. I kept stuffing whilst stitching together his head to keep him firm and to support the ears which went on next. I used wool to stitch them in place as it was strong enough to keep them upright. Finally I attached arms, and a tail in the same way and ta-dah!

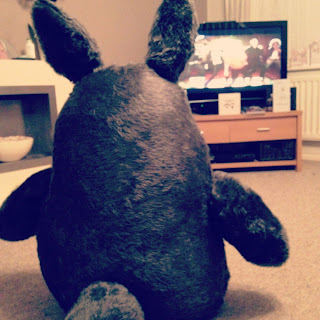
One massive Totoro! I was pretty chuffed with him :) He only took a day to make and was great fun. The fur fabric is very forgiving so if you're not the neatest of crafters don't worry! One word of caution though, he does like watching a spot of tv.........


Until next time!
Amy :)

Thursday, 9 August 2012

How to: Crochet Heart Garland

Hi everyone! We're switching things up a bit tonight and instead of Alison at the helm, it's Laura. Don't worry, you're in safe hands I promise.

Let me tell you a little something about myself. I absolutely blooming love crochet. It's so fun and infinitely less stressful than knitting. All of the yarn-based joy, none of the dropped stitches...

Whenever a present giving occasion arises, it is always my go-to craft.  Five minutes on Pinterest and I've found a pattern and am on my way. Most recently, when Alison got engaged (exciting!) and asked me to be bridesmaid at the wedding (double exciting!!). So, to say a simultaneous congrats and thank you, I decided to make her and her fella a little something.


I decided to make her some heart bunting for her fireplace - with a crochet twist. I made my bunting using this pattern by Bunny Mummy (she has some other lovely crochet tutorials over there - check it out!). Full credit for this pattern lands squarely with her. Fancy making your own? I've translated the pattern for the UK crafter. 

Ready? Let's go! You'll need a 4mm crochet hook and 2 or 4 colours of DK yarn of your choosing. I opted for a purple, green, coral and cream combo - but you can choose whatever colours you like!

1. Chain 5 and join with a slip stitch.

2. Chain 4, then, working into the hole in the middle of the circle, (1 treble + 1 chain) x 11 times. (12tc).


3. Tie on your new colour. Again, this time you'll be working into the spaces. Chain 3 then work 1 treble. In the next 11 spaces work 2 treble crochets. (12 groups of 2 tc).


4. Tie in your next colour. Once again, working into the spaces, chain 3 then 2 treble crochets. In the following 11 spaces, work 3 trebles. (12 groups of 3 tc).


5. Tie in your last colour. Chain 1, 1 treble, chain 1.

6. In the next space - 3 double treble, 2 chain, 3 double treble, chain 1.

7. In the third space, 3 half double treble, chain 1.

8. In the next 3 spaces, 3 treble, chain 1.

9. In the seventh space, 1 half double treble, 2 double treble, chain 2, 2 double treble, 1 half double treble, chain 1.

10. In the next 3 spaces, 3 treble, chain 1.

11. In the eleventh space, 3 half double treble, chain 1.

12. In the twelfth space, 3 double treble, chain 2, 3 double treble, chain 1.

13. In the first space you worked in, 1 treble, 1 slip stitch.


Right that's you nearly done, just one more round to go - it's starting to look a bit heart shaped now...

14. OK, same colour, first space - 2 slip stitch, 1 half treble, chain 1.

15. Second space, 3 treble, chain 1, 1 treble, 1 half double treble, 1 double treble, chain 1.

16. Third space, 5 double treble, chain 1.

17. Fourth space, 1 double treble, 1 half double treble, 1 treble, chain 1.

18. In the next 3 spaces, 3 treble, chain 1.

19. Eighth space, 3 treble, chain 2, 3 treble, chain 1.

20. In the next 3 spaces, 3 treble, chain 1.

21. Twelfth space, 1 treble, 1 half double treble, 1 double treble, chain 1.

22. Thirteenth space, 5 double treble, chain 1.

23. Penultimate space, 1 double treble, 1 half double treble, 1 treble, chain 1, 3 treble, chain 1.

24. In your final space, 1 half treble, 2 slip stitch.

And you're done, 1 crocheted heart. Weave in your ends et voila! Beautiful.


What you do now is up to you. You could attach a ribbon to the middle and hang them individually. You could use them as patches. I chose to make them into a garland. I did this simply by creating a long chain, picking up stitches on the hearts every time I wanted to join one on. Before I did this, I took Bunny Mummy's advice and covered the hearts in starch spray just to stiffen them a bit.


I got a bit carried away - I could have made hundreds of these!

Aren't they pretty?


And here's the finished article, in situ, on Alison's fireplace (or 'Laura's Gallery' as she affectionately calls it!


So, anyone feeling inspired to make one of their own? We'd love to see!


Wednesday, 1 August 2012

Mr. Tortoise Tutorial

Hello all!

After helping Amy out with learning to crochet last week, I remembered how much I enjoy it. I've been on a sewing binge the last few months so was nice to be back with the wool.

For quite a while I have really, really, really wanted a tortoise. I've wanted one of my very own for ages, my mum had a tortoise, which was still around for much of my childhood (see me below!). 
Me, about two, trying to figure out how I can pester Humphrey, in my grandma's back garden  in Yorkshire.
I've finally managed to get one, a little bit fluffier than the original Humphrey tho! I've spent a while on pinterest looking at tortoise crochet patterns, but in the end decided to just wing it (with a little hexagon help from Lucy at Attic 24!).
Mr. Tortoise, the final cheeky little dude!


So, straight in to the pattern!

TOP
  • Choose your yarn/wool. For mine I chose from my stash pale yellow, dusky pink, bright burnt orange and a beautiful light blue I love just a little bit. It's all acrylic double knit, the blue is a little thinner but worked just as well. Use a 3.75mm crochet hook to get a tortoise this size.
  • You need to crochet 7 hexagons. I used this very helpful tutorial from Lucy at Attic 24 must take all credit for this, she has incredibly helpful descriptions that really helped me when I started crocheting - go check her blog out! For those who already have crochet ability, here is the pattern in basic form.
  • WOOL A Chain 4 and join to make a ring.
  • WOOL A Chain 2 and double crochet 11 in to ring and join.
  • WOOL B Chain 3 and crochet 2 'bobble stitches' in to front post of previous round. 1 chain between each of these 2 stitches and join. 
  • WOOL C Chain 3 and double crochet x 3 in to each chain link of previous round, spacing with one chain between each cluster, join.
  • WOOL D Slip stitch in to chain link of previous round. Chain 3 and slip stitch in to each chain of previous round. Join.
  • WOOL D Chain 3, double crochet x 2, chain 2, double crochet x 3, all in the 3 chain loop of previous round. Next loop, double crochet, x 3, repeat in this pattern all the way round. 
  • Done! For this one anyway!
My finished hexagons.
Hexagons joined together
  • Crochet all the hexagons together, starting with attaching to the central hexagon and then joining each along the sides. Or you can sew with a matching wool, but a simple slip stitch crochet I think makes it more secure.
HEAD AND LEGS
  • Choose one colour, I went with the orange. This I made up and just kept checking the size with the final hexagons. Here is my pattern:
  • HEAD Chain 28 and join to form a loop.
  • Double crochet into each chain x 28. Join.
  • Chain 2 and double crochet all round. Do this 3 more times so you have 5 rows.
  • Chain 2, 2 double crochet and then 1 decrease stitch, repeat all round circle.
  • Chain 2, 2 double crochet and then 1 decrease stitch, repeat all round circle. This should come to a point, and then slip stitch along top edge to complete.
Legs all piled up.
  • LEGS Chain 20 and join.
  • Chain 2 and double crochet all around, join. Repeat so you have 4 rows.
  • Chain 2, 2 double crochet and 1 decrease stitch. Repeat til you come to a point and slip stitch closed.
  • Nearly there! Now is definitely time for tea and a biscuit.
TORTOISE UNDERBELLY!
See how the belly matches up with the top?
  • Right, back to it.
  • Tortoise underbelly! This was a little bit tricky for me, as I was winging it and trying to smush it so it looked right. That saying, it is just a double crochet and chain stitch, with a few increases and decreases, so all in all was fairly quick.
  • Make a chain, measure this against one of the sides of your hexagon to get the length and number of stitches. Double crochet in all chains. 
  • Next row, increase by an extra stitch into each previous double crochet on either side of the row. Repeat until you have the same size as your hexagon edge, increasing each time for about 4 rows. Be careful to stretch and fiddle with it, to make sure it fits.
  • At the end of your row, chain again! Again, measure against your hexagon top to see how many you need, then chain up and double crochet along the line. When you get to the last stitch, slip stitch down and chain along again. 
  • Chain up to the next row, and double crochet along to meet the previous line. Fasten off and start again fresh.
  • Repeat the same process from before, double crochet all along the line, increasing with an extra stitch on each edge, until you reach the right size, then start decreasing by 1 stitch on each edge.
  • Repeat this whole process until you have a whole big piece!
INSIDE

  • Almost done. Stuff each of your legs and head, and sew these in to the indents between the hexagons. See image above. Sew on the 'wrong' side, and check that it is really secure.
  • Place your top over the bottom piece, and sew in either a whip stitch or blanket stitch all around. Be careful around the leg and head areas, sew only in to the top edge, and not all the way through.
  • Use a contrasting thread and sew some eyes and a smile on the face of your tortoise :) Hide the ends of the wool in the stuffing inside the head.
  • Leave a gap. Now is time for a very little bit of sewing. Using the tortoise as a guide, cut two pieces of plain fabric.
  • Sew these together along the edge, don't worry about being too neat as this will all be hidden. Leave a gap and stuff with some lovely soft pillow stuffing. Sew around the edge to close.
  • Put your little 'pillow' in to the tortoise skin, and finish sewing around the edge.
DONE! Now you have your very own little tortoise pal. I love him, although it might be that he is off to live with my niece when she comes to stay in a few weeks, we will see if she loves him as much as I do!


Love Ali

xx

Related Posts Plugin for WordPress, Blogger...